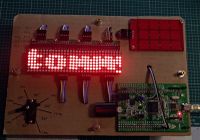
ST, STM32F4 Discovery
目錄
- 1 Download the GNU/ARM toolchain
- 2 Download and Build STLINK
- 3 Download STM32 Libraries and Blinky Example
- 4 Compile Your Source Code
- 5 Program ARM's Flash and Run Code
- 6 Using external ST-Link
- 7 GDB
- 8 application - MPR121, capacitive touch sensor controller
- 9 application - MAX7219, Serially Interfaced, 8-Digit LED Display Drivers (interact with MPR121)
- 10 application - MAX7219, Serially Interfaced, 8-Digit LED Display Drivers (scrolling text)
- 11 application - CS43L22, built-in DAC(audio playback)
- 12 application - MG90S, Metal Gear Servo
- 13 application - Joystick
- 14 application - nRF52, (BLE - UART - STM32F4)
- 15 application - MeArm, mini robotic arm
- 16 Reference
Download the GNU/ARM toolchain
- tar -xvjf gcc-arm-none-eabi-4_8-2014q2-20131204-linux.tar.bz2
- export PATH=$PATH:~/gcc-arm-none-eabi-4_8-2014q2/bin
Download and Build STLINK
- sudo apt-get install autoconf pkg-config libusb-1.0 git
- git clone https://github.com/texane/stlink.git
cd ~/stlink
./autogen.sh
./configure
make
Download STM32 Libraries and Blinky Example
Compile Your Source Code
- Edit Makefile
- STLINK=/home/rowol/stlink #Example, change to your location
- STM_COMMON=/home/rowol/stm32_discovery_arm_gcc/STM32F4-DISCOVERY_FW_V1.1.0
- make it
Program ARM's Flash and Run Code
- make burn
or
- st-flash write STM32F4-Discovery.bin 0x08000000
Using external ST-Link
- Remove CN3 jumper
ST-Link     STM32F4
VCC            3V
SWIO           PA13
SWCLK          PA14
VDD            VDD ( depends on product, could range from 1.8v - 5v )
GND            GND
GDB
In the directory with your source code, I've also add a .gdbinit file which contains:

define reload
kill
monitor jtag_reset
load
end

target extended localhost:4242
load

This will execute whenever you start GDB in the source directory

To start up:

~/stlink/st-util                 #Start GDB server
arm-none-eabi-gdb main.elf       #In a second terminal window, start GDB

continue                         #Starts code running, or use other GDB commands to
                                 # set breakpoints, etc first...
